Odoo v18
Downloading and Installing
1. Download the addon module
Visit the Odoo App Store and navigate to the ePaymentConnector page or search for ePaymentConnector. ePaymentConnector only works with Odoo.sh or Odoo on-premise. ePaymentConnector does not support Odoo Online at this time. Choose the appropriate version compatible with your Odoo instance (version 15, 16, 17, or 18.) Click the “Download” or “Purchase” button to obtain the module.
2. Add the module to the third-party modules directory
After the module file is downloaded, locate it on your system. Move or copy the module file to your Odoo server’s third-party modules directory. This directory is typically located at addons or custom_addons in your Odoo installation directory.
3. Install the external Python Library xmltodict
ePaymentConnector requires the xmltodict library to function properly. Install the xmltodict library by running the following command on your Odoo server:
pip install xmltodict
Confirm the library is successfully installed before proceeding with the next steps.
4. Restart Odoo service
After adding the module to the third-party modules directory and installing the required library, restart the Odoo service to ensure the changes take effect. Use the appropriate commands based on your server configuration to restart the Odoo service, such as:
sudo systemctl restart odoo
or
sudo service odoo restart
5. Activate debug mode
Access your Odoo instance and activate the debug mode. To activate debug mode, append “?debug=1” to your Odoo website URL or follow the specific instructions based on your Odoo version and setup.
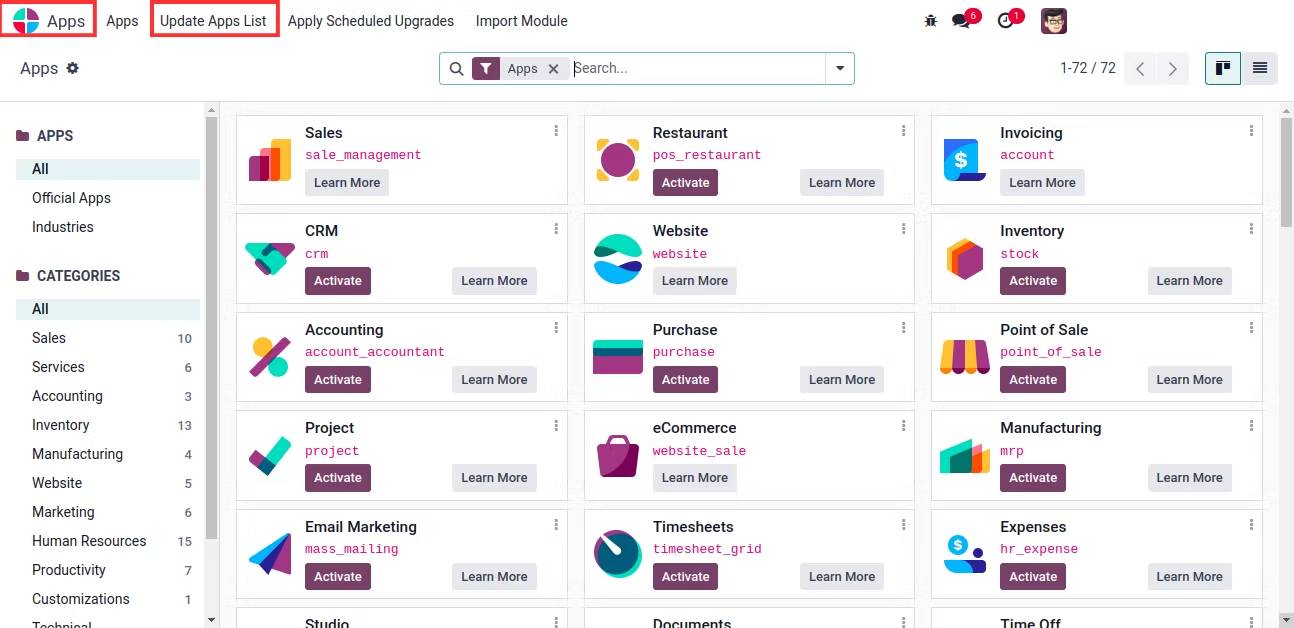
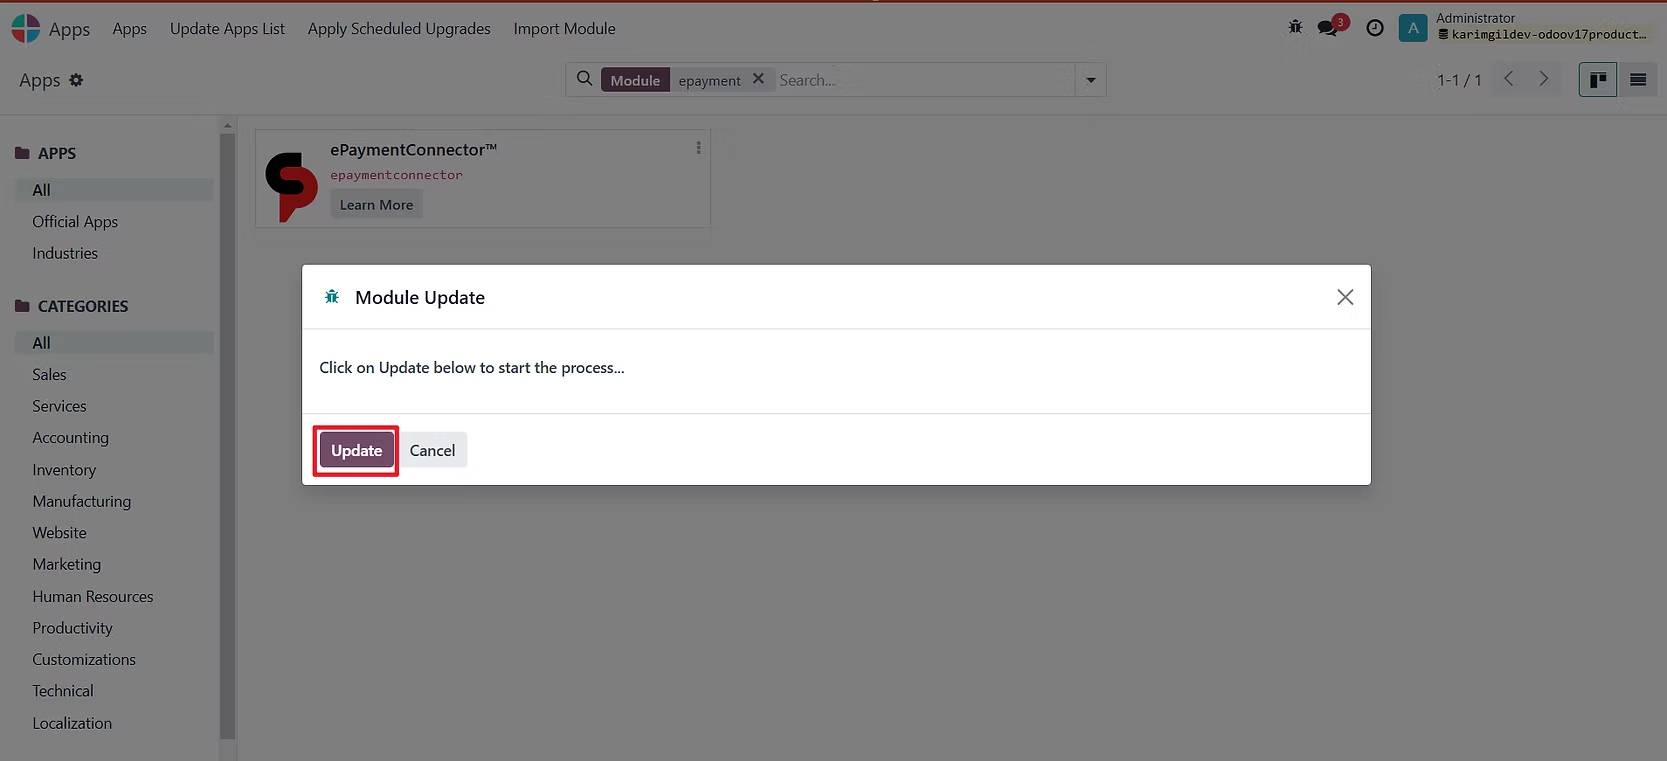
6. Update the app list
In the Odoo interface, navigate to the “Apps” menu. Select “Update App List” to refresh the list of available modules. (Refer to images 6.1, 6.2 in the slider.)
This step ensures that Odoo recognizes the newly added ePaymentConnector module.
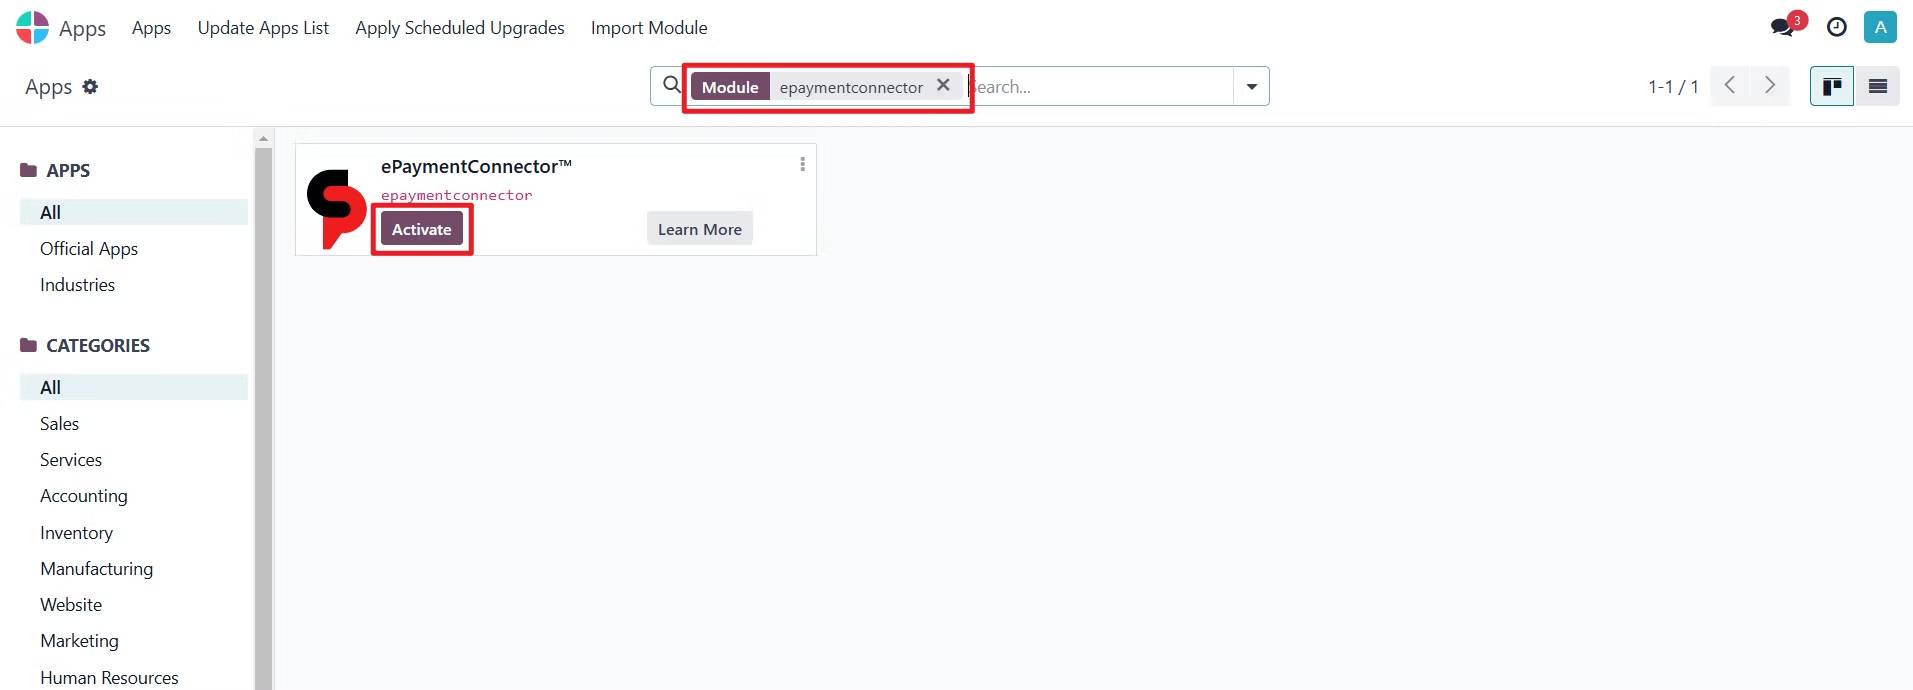
7. Find and install ePaymentConnector
In the Odoo “Apps” menu, search for “ePaymentConnector”. Locate the ePaymentConnector module in the search results. Click the module to access its details. Click the “Activate” button to install the ePaymentConnector module. (Refer to image 7.1 in the slider.)
Signing Up with Global Payments
Please email us at sales@epaymentconnector.com and our sales team will help you with your merchant account sign-up with Global Payments.
Configuring
After you have successfully installed the ePaymentConnector app, follow these steps to configure it.
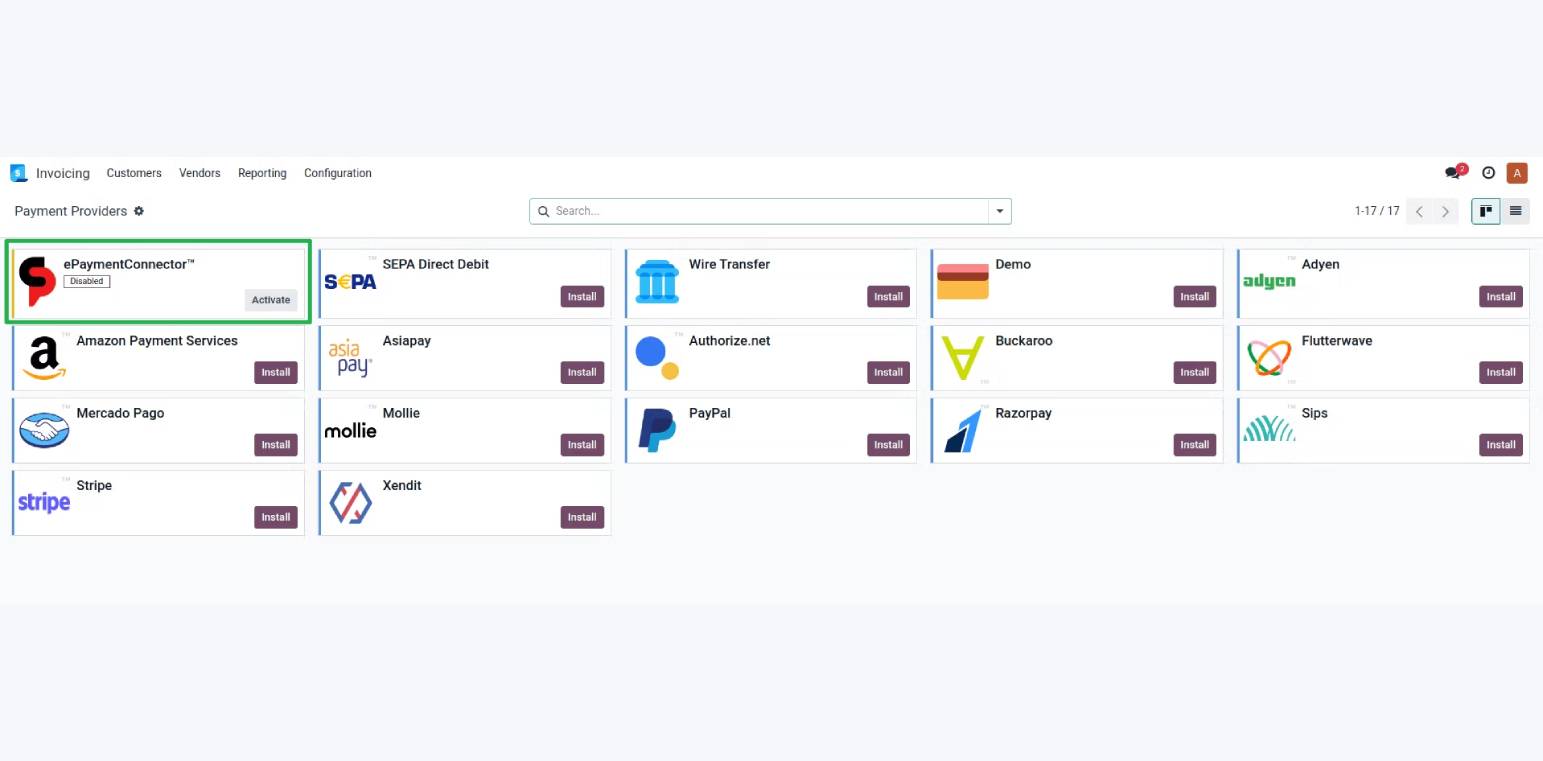
1. Access Payment Acquirers Configuration
Navigate to the “Accounting” / “Invoicing” module within your Odoo instance. From the module menu, select Configuration → Payments → Payment Providers. You should see a list of available payment acquirers, including ePaymentConnector. (Refer to image 1.1 in the slider.)
2. Select ePaymentConnector
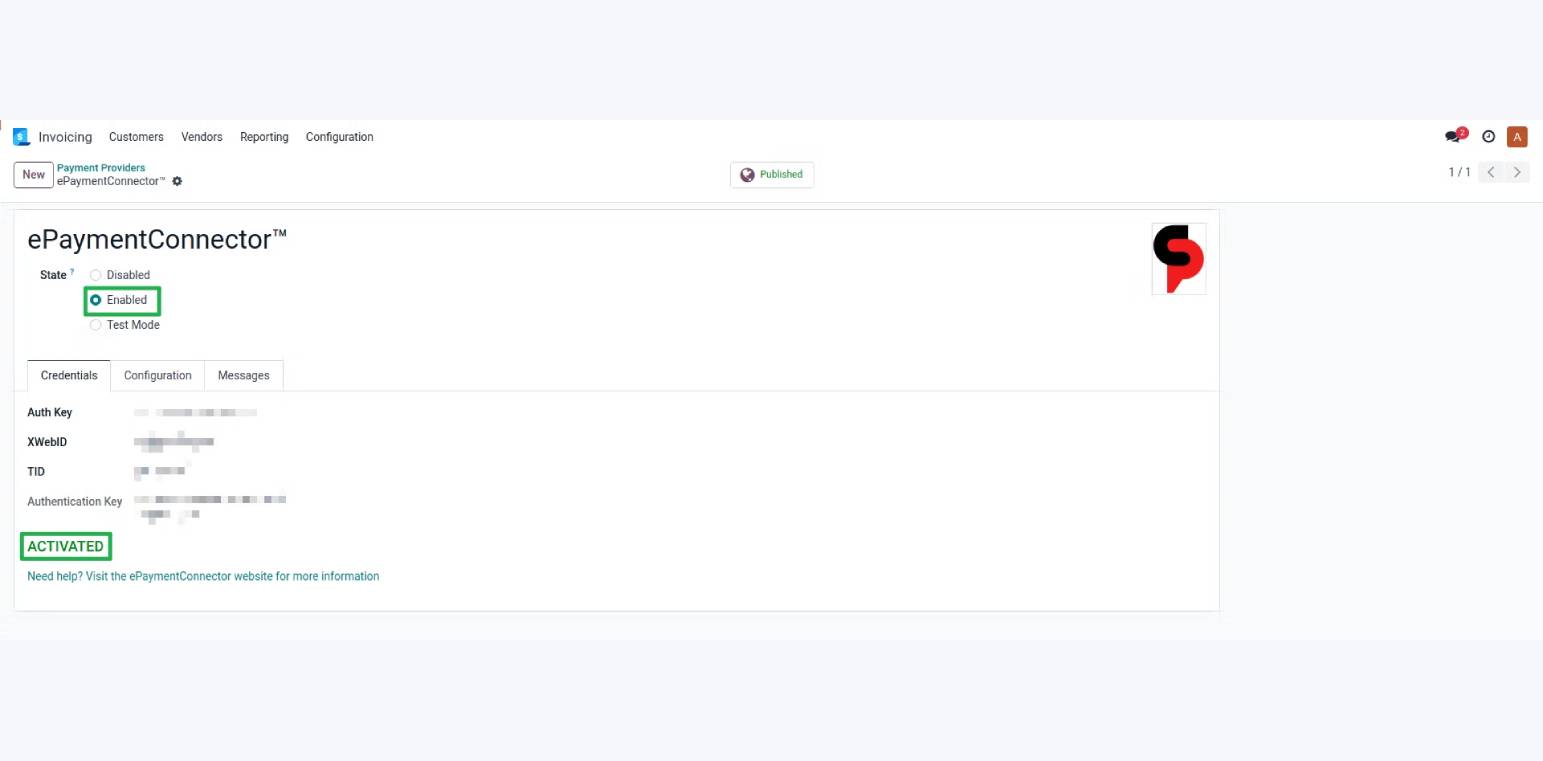
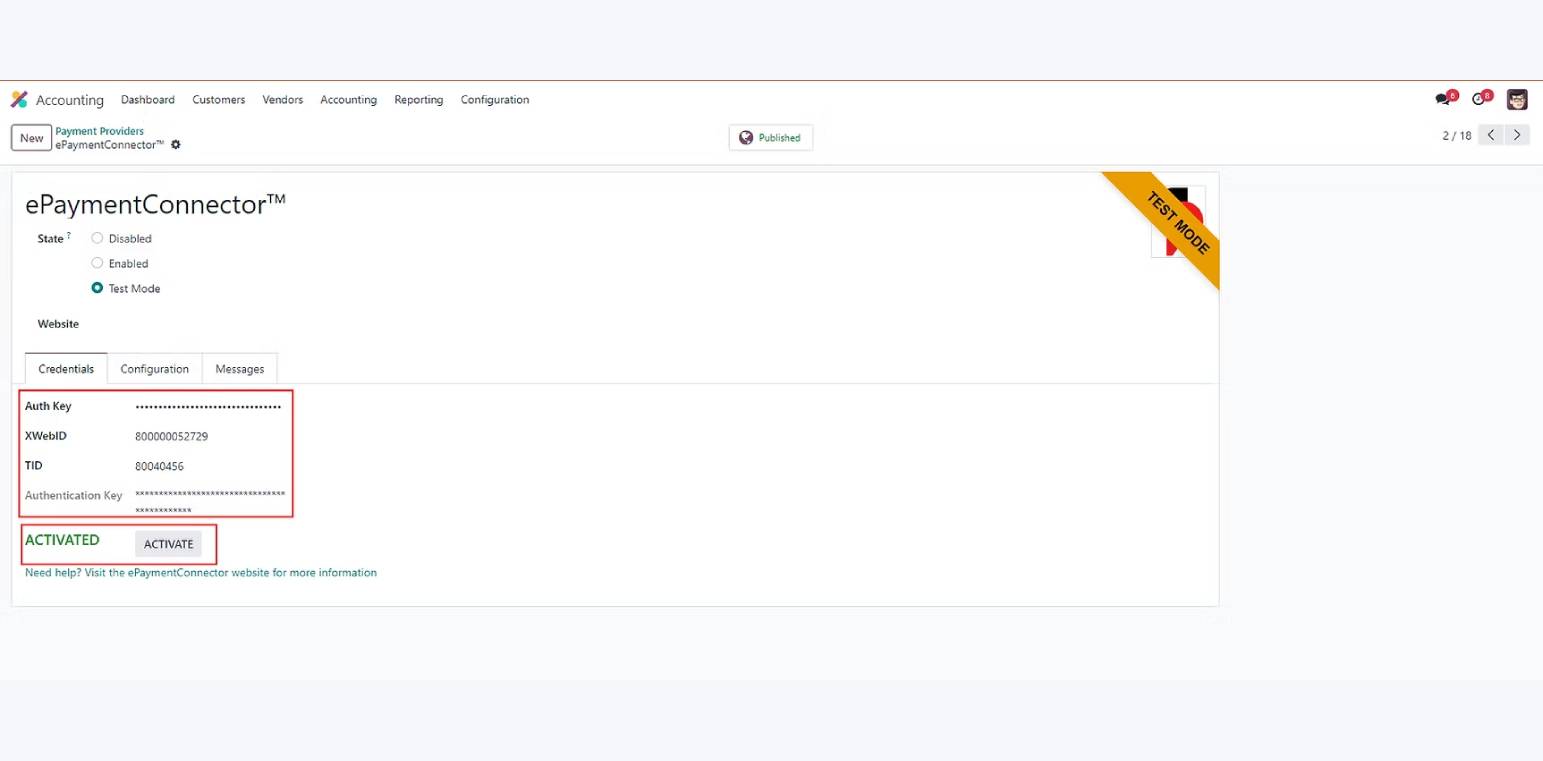
Locate ePaymentConnector from the list of available modules. Click ePaymentConnector to access its configuration page. (Refer to image 2.1 in the slider.)

-
- Disable: This setting deactivates ePaymentConnector, rendering it inaccessible and unusable on the checkout page.
- Enabled: Activates ePaymentConnector in your production Odoo environment for live transactions.
- Test Mode: Enables test mode exclusively for development purposes, allowing simulated transactions for testing purposes. (This option may not work correctly in all environments.)
-
- Auth Key, XwebID, TID: These are merchant credentials provided by Global Payments, required to use ePaymentConnector.
- Authentication Key: This key is only required and displayed when using the Inline payment mode.
- “ACTIVATE” Button: Verifies your merchant keys and generates a masked authentication key necessary for transaction authorizations. Until you successfully activate your connection using the merchant credentials from Global Payments, ePaymentConnector will not work on your website and allow payment transactions to be processed.
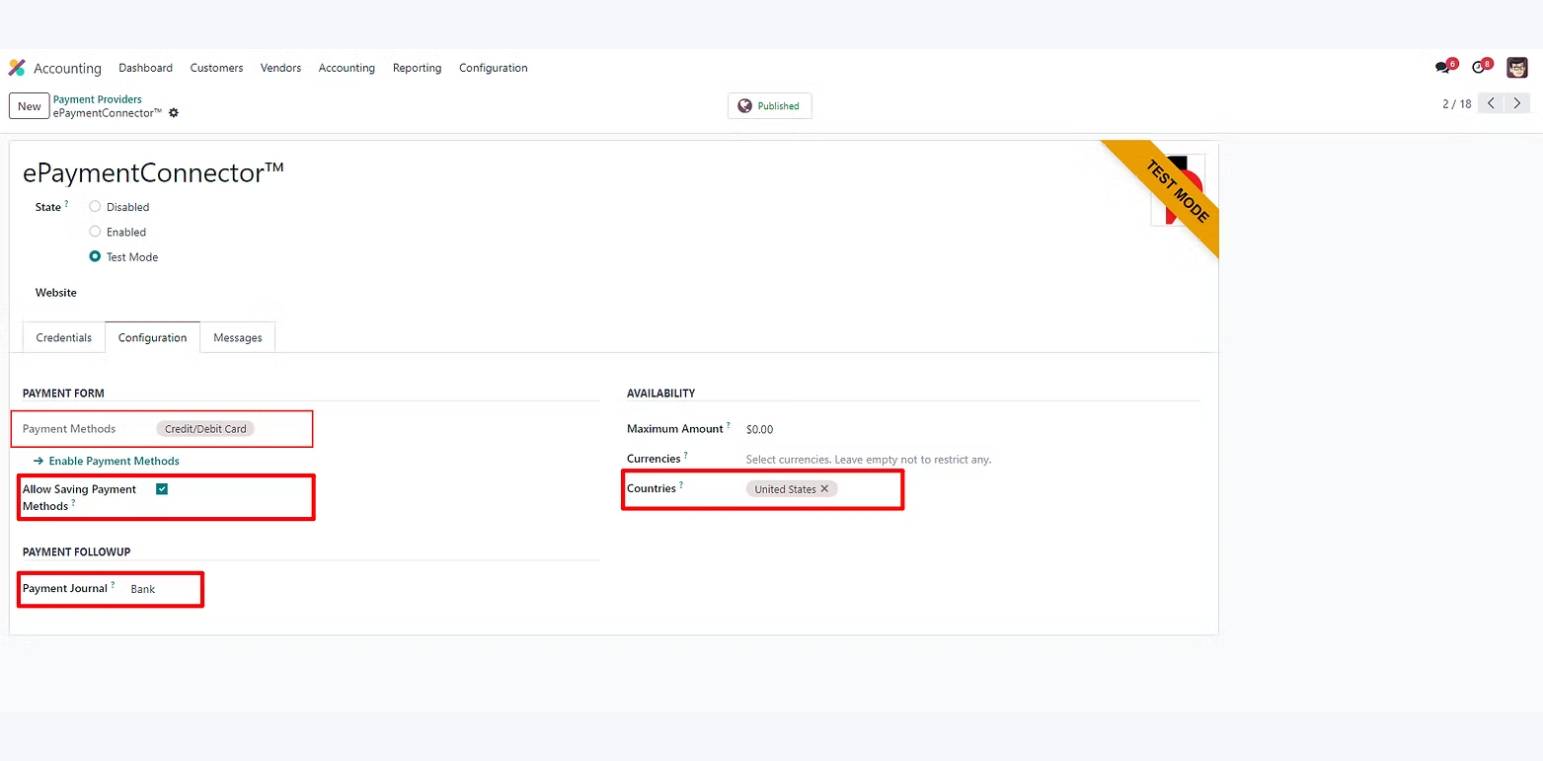
Configuration (tab)
- Address Validation: When enabled, ePaymentConnector verifies billing addresses for each transaction, enhancing security to reduce fraud risk.
- Payment Journal: Select your pre-configured Odoo payment journal to capture payments processed through ePaymentConnector. You must setup a payment journal in Odoo before completing this step. Please refer to the Odoo documentation, if needed.
- Countries: ePaymentConnector currently supports payment transactions only in the United States and Canada. ePaymentConnector will not work for payments transactions submitted from countries besides the United States or Canada.
(Refer to image 3.3 in the slider.)
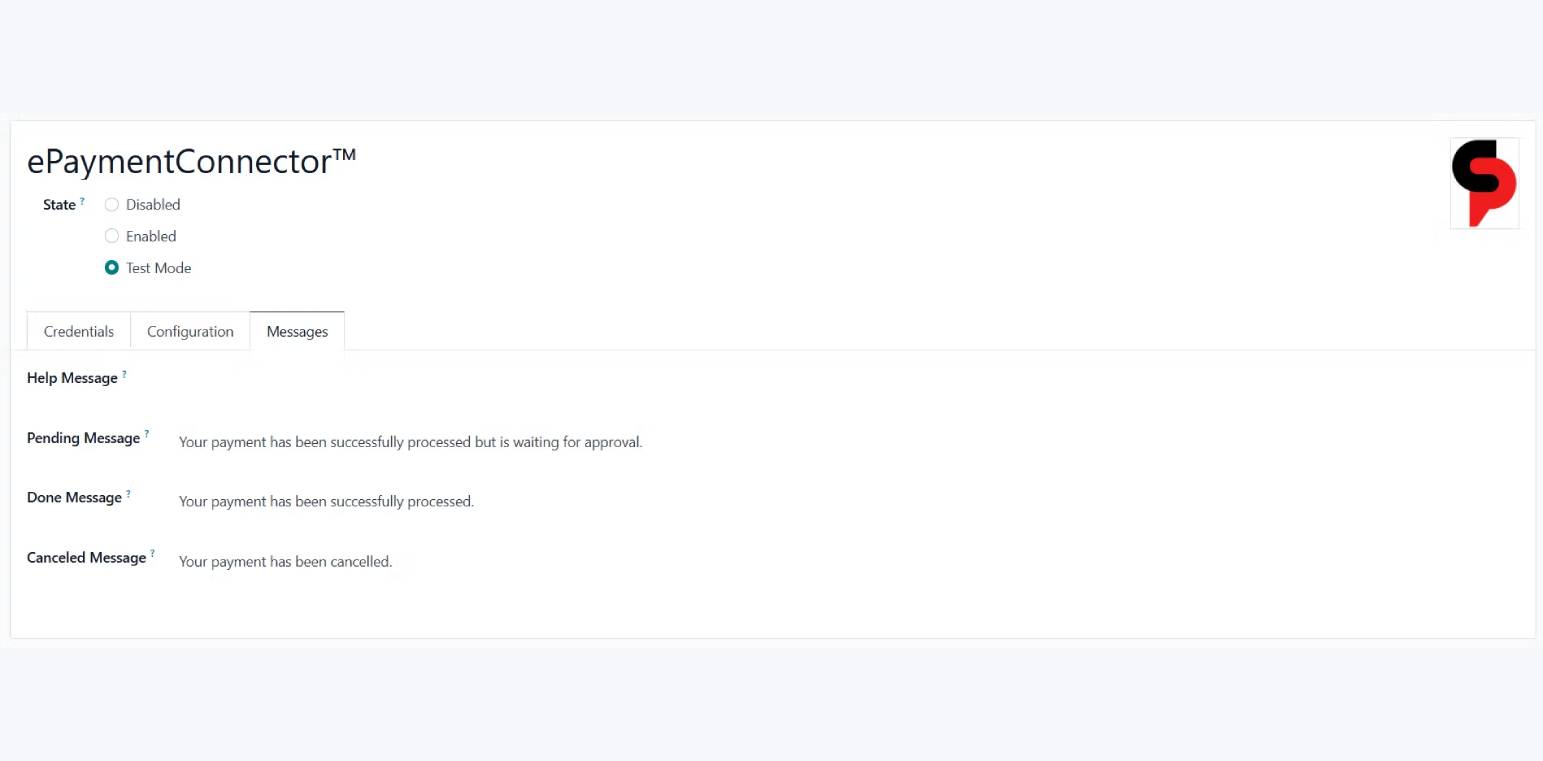
Messages
These messages apply to payment processing activity and are configurable directly from the Odoo user interface. They allow you to customize your communications with your customers during the payment process according to your specific business requirements.
(Refer to image 3.4 in the slider.)
The Checkout Process
This section describes the experience during the checkout process on your website. Please refer to the images in the slider where indicated.
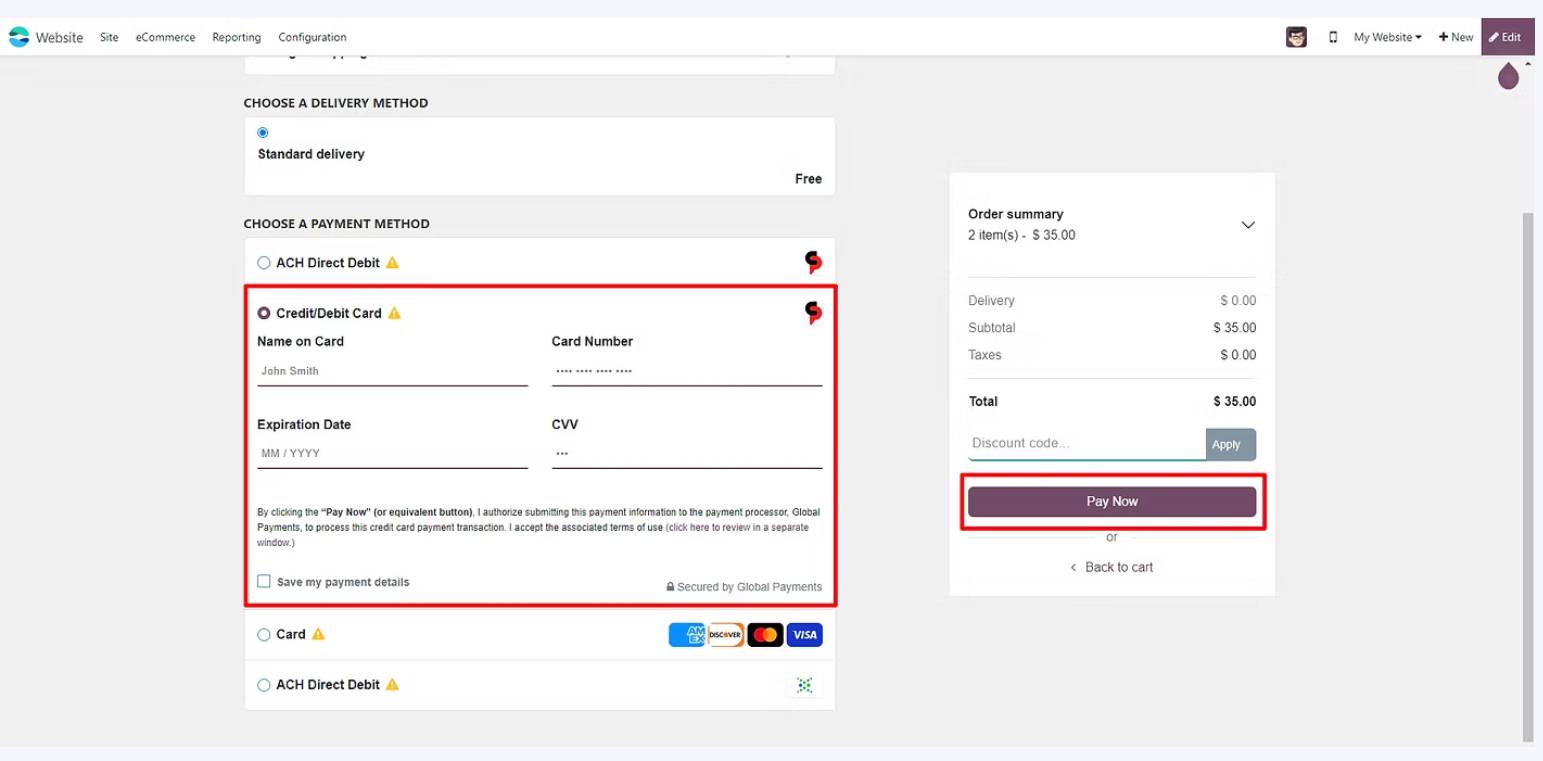
Shoppers will select products and proceed to the checkout page on your website. On the payment page, they will see ePaymentConnector listed among the available payment methods to checkout using a credit card. (Refer to image 1.1)
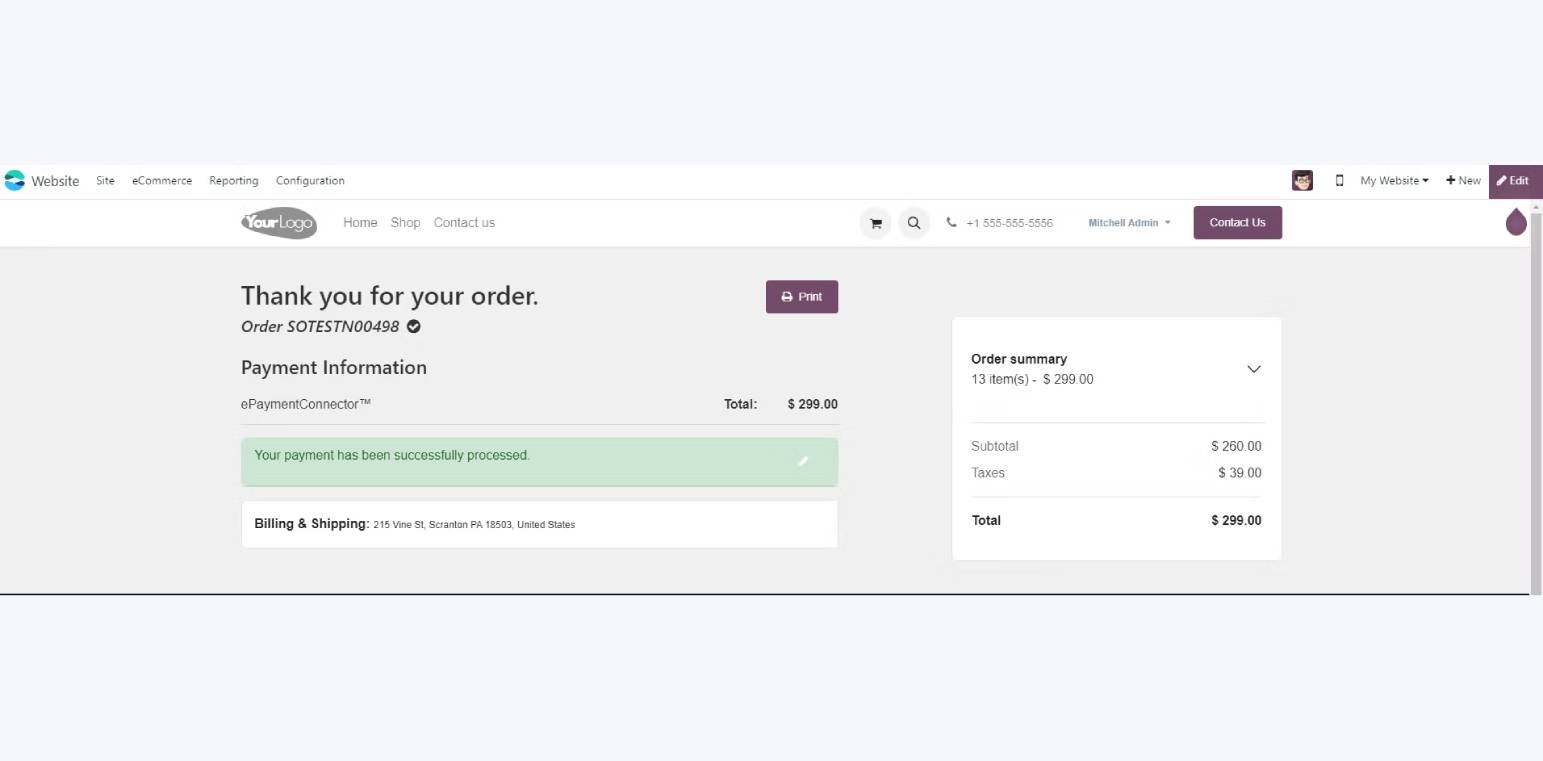
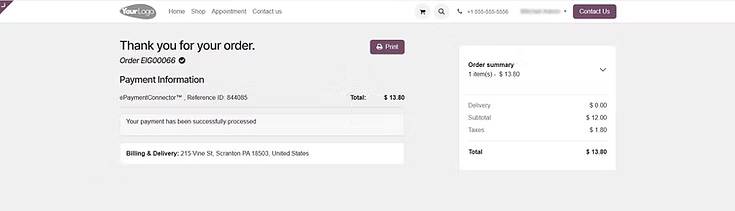
A secure form is embedded directly on the webpage for your shoppers to enter their credit card details on your website at checkout. They will click the “Pay Now” button to process the payment. The payment details will be sent to directly to the Global Payments payment gateway for processing without leaving your website. The payment status response (success or failure) will be returned and displayed to shopper. (Refer to images 1.1, 2.1, and 2.2.)
Saving Payment Methods
ePaymentConnector allows your customers to securely save their credit card information for quick checkout in the future. This option must be enabled and allowed by your business in the ePaymentConnector setup configuration. Please refer to the images in the slider where indicated.
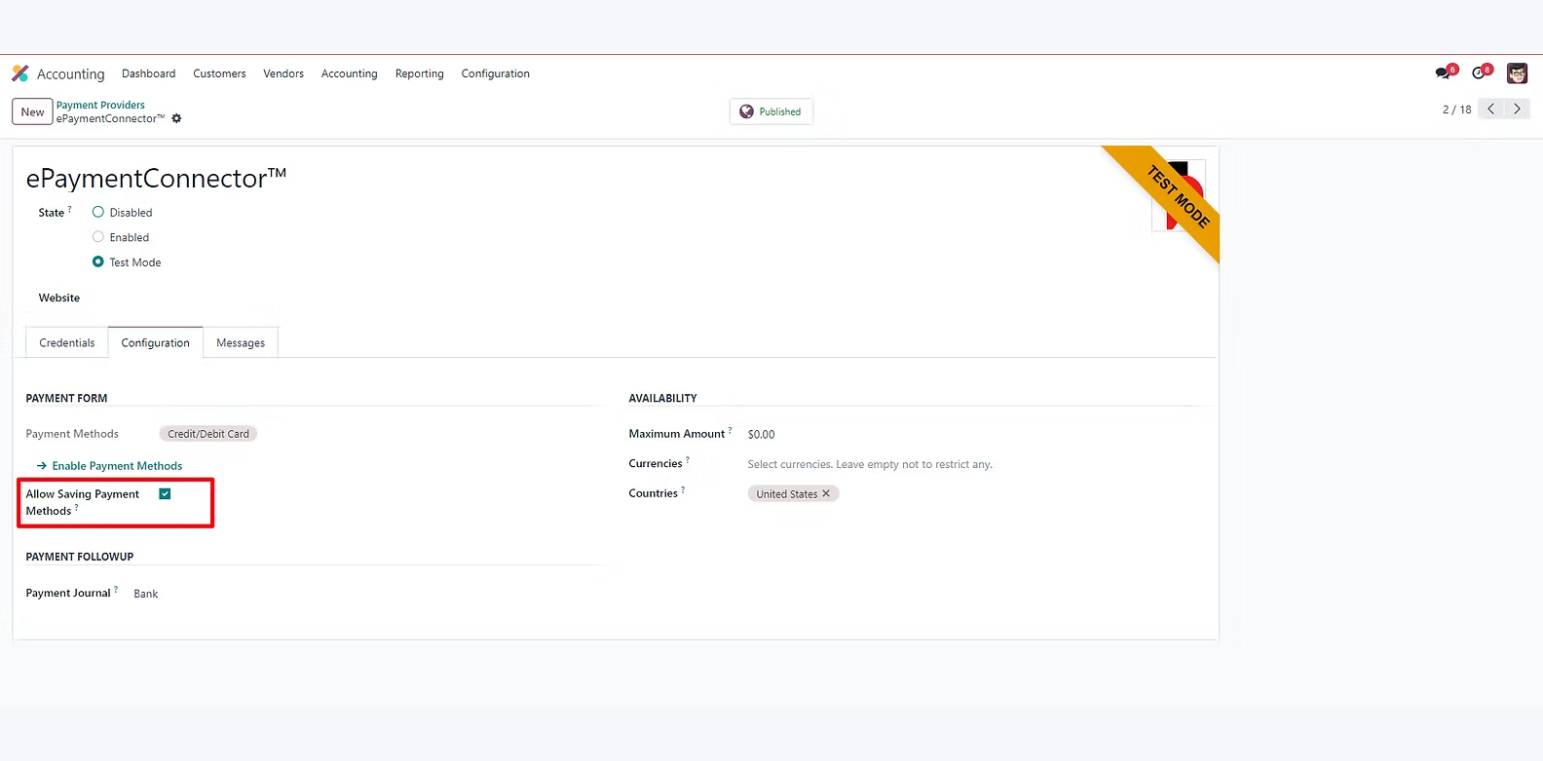
1. Enable the save payment method option
Enable the option for your shoppers to save their payment methods for future use during checkout labeled “Allow Saving Payment Methods.” (Refer to image 1.1 in the slider.) If this option is not checked then shoppers will not be able to save their payment information for future reuse.
2. Capturing, saving, and reusing payment information
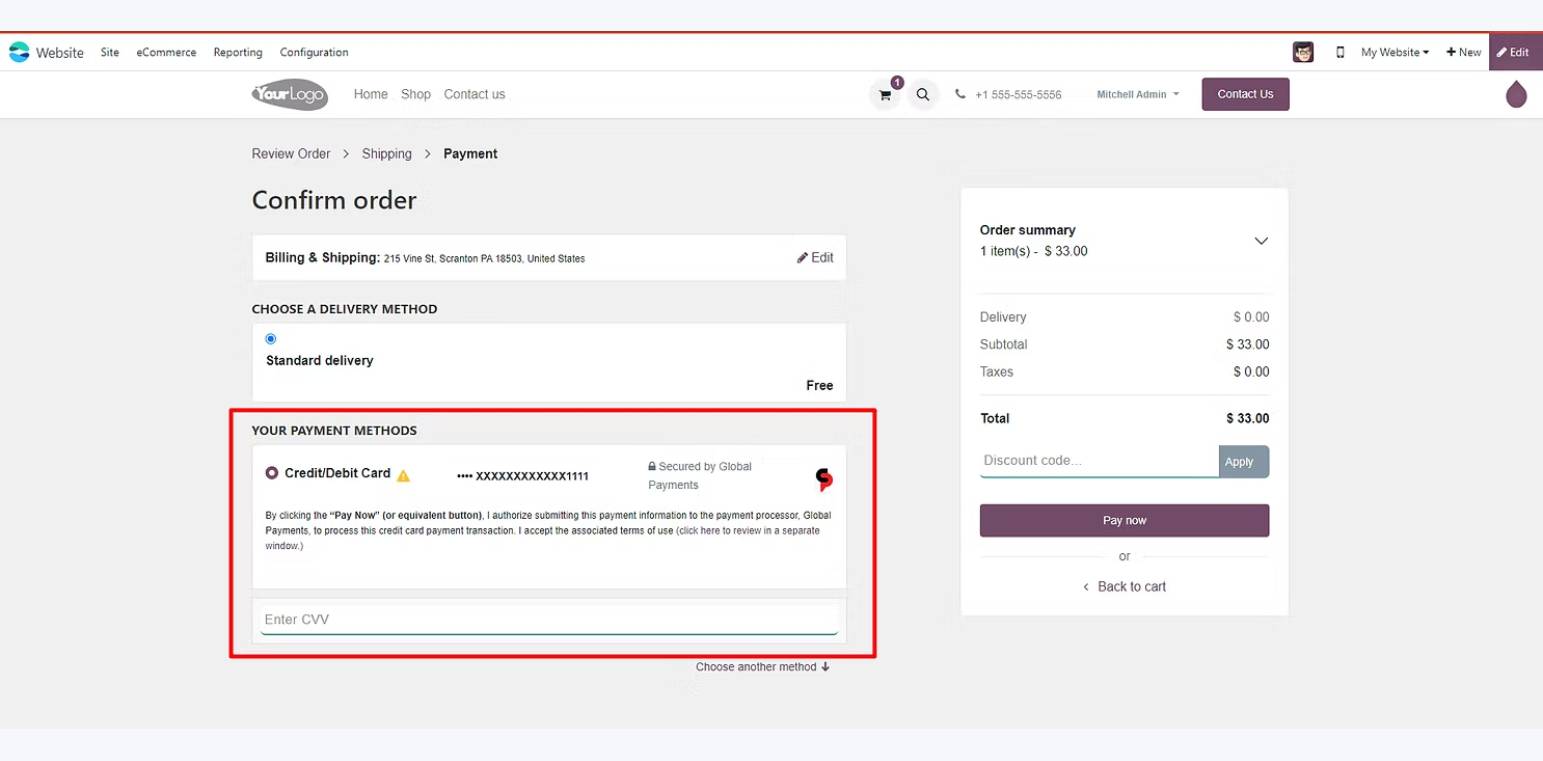
At checkout, shoppers will have the ability to save their credit card payment information for future recall. The actual credit card information will not be saved, recalled, or displayed at any time. Instead, a reference token will be saved in in Odoo in lieu of the actual credit card information. When shoppers choose to access their saved payment information, the reference token will be retrieved and display the last digits (3 or 4) of the credit card number for identification purposes (refer to image 3.1 in the slider.)
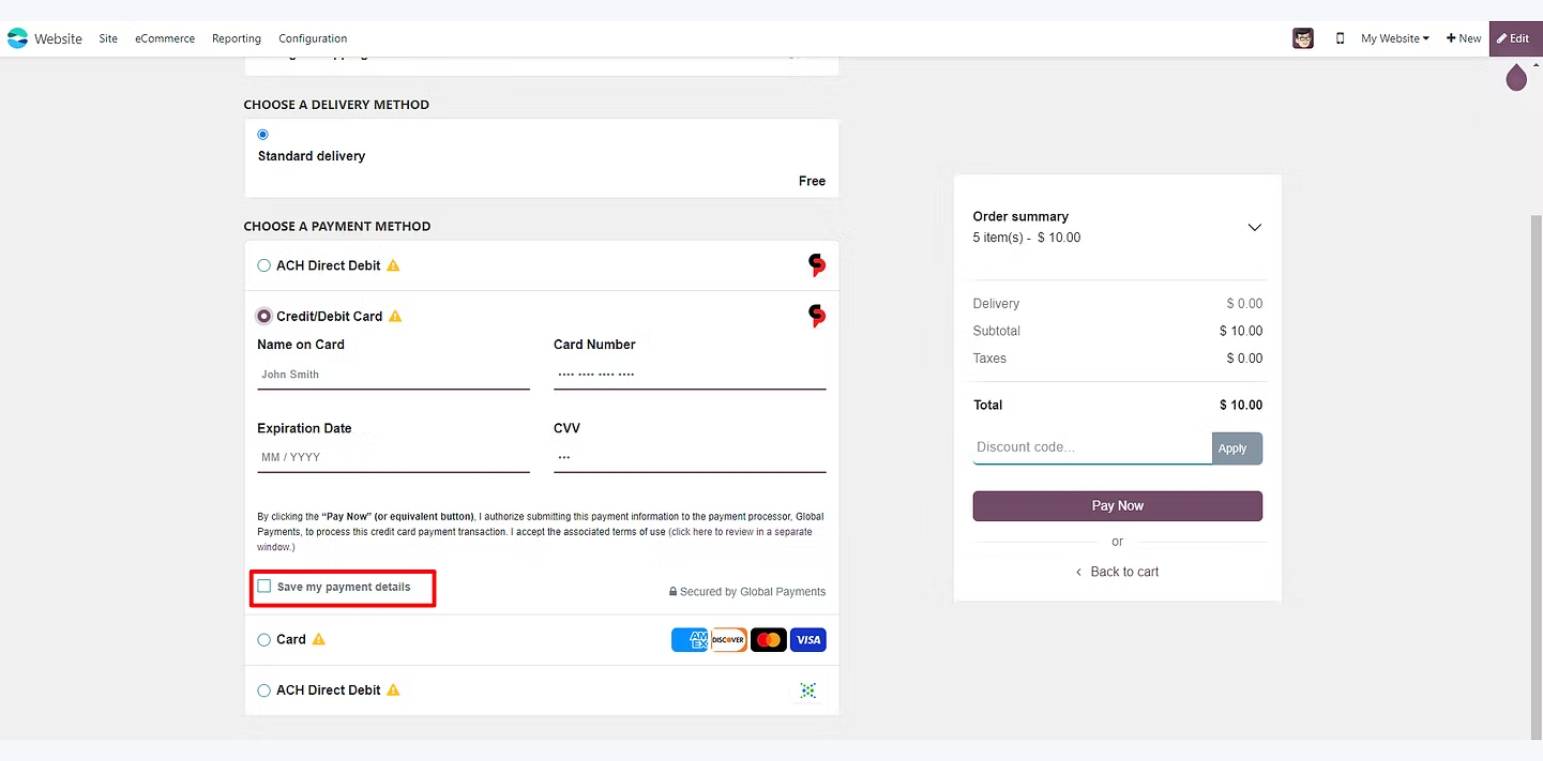
To initially save the payment information (and create a reference token for reuse), shoppers will need to consent by selecting a checkbox or toggle switch during the payment process, labeled “Save my payment details.” This will instruct Odoo to create and save a reference token corresponding to the credit card information entered. Otherwise, customers will have the choice not to save their payment information and reenter it each time when they checkout on your website.
When they return as customers on your website, they will be shown the list of saved payment methods (last 3 or 4 digits) to choose from and use to checkout. When they checkout the reference payment token will be used to process the payment transaction with Global Payments (refer to images 2.1 and 3.1 in the slider.)
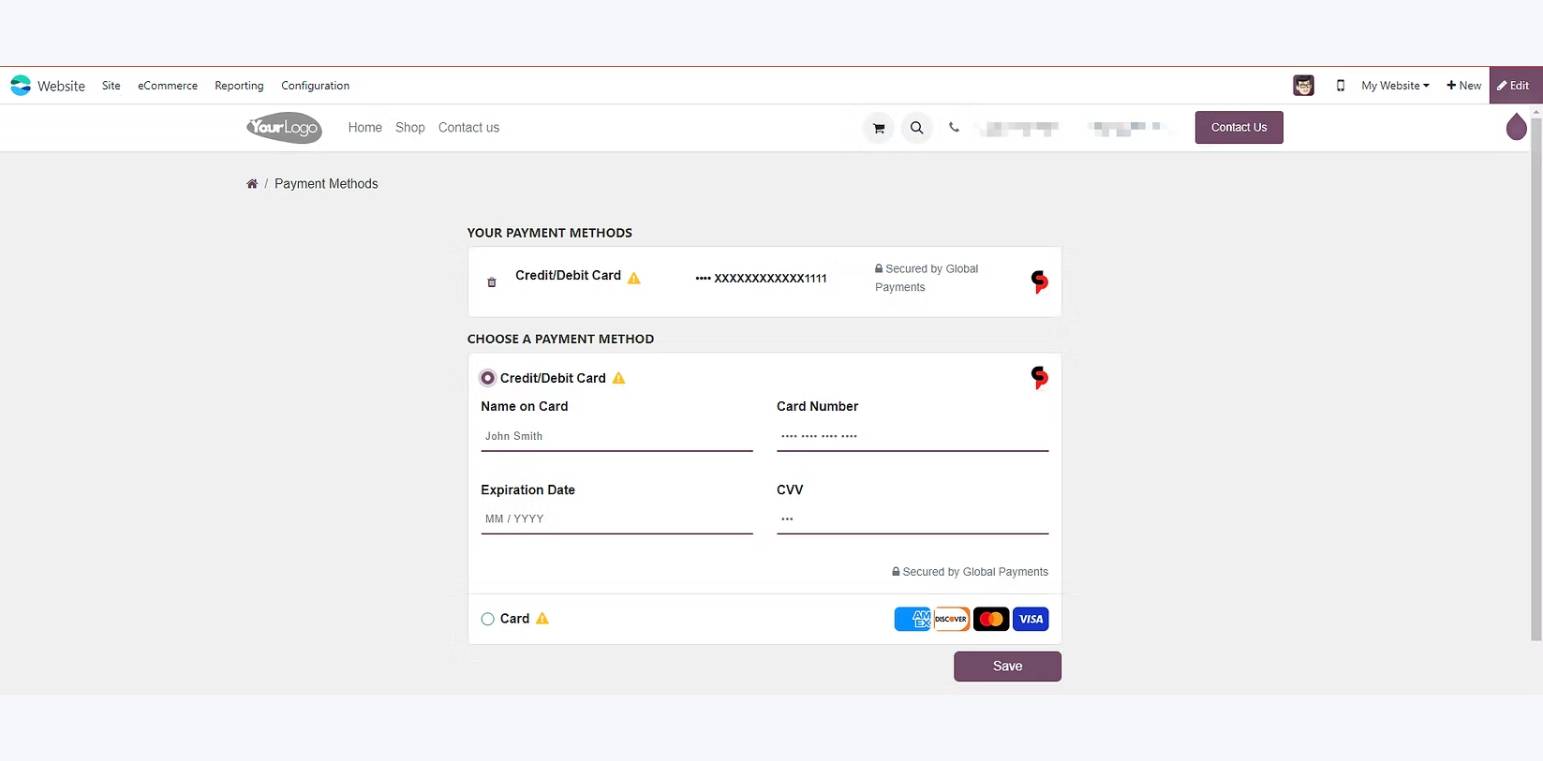
3. Managing saved payment methods
Your customers can also manage their saved payment methods, including adding or deleting saved payment details in Odoo. Payment information (including their saved payment tokens) cannot be modified or edited. (Refer to images 4.1 in the slider.)